
Display Mode
Controls how the image plane appears in views and in the rendered image. The default setting is RGBA.
An offset factor applied to all colors in the image plane. Maya adds the Color Offset color to all colors in the image plane. For example, you can brighten an image plane that appears too dark by dragging the slider to set the Color Offset color to a shade of grey. The default color is black (no effect).
Image Plane
Select one of the following options:
Maya attaches the image plane to the camera. When you move the camera, the image plane also moves. Use this setting when you want to use the image plane as a reference for animating objects in the scene (such as motion matching or rotoscoping), or if you plan to render the image plane as a background.
Maya fixes the image plane in space. When you move the camera, the image plane does not move. Use this setting when you want to use the image plane as a reference for modeling objects in the scene.
The default setting is Attached to Camera for perspective cameras, and Fixed for orthographic cameras.
If set to Fixed, you can adjust the image plane using the “Placement Extras” attributes.
Type
The default setting is Image File. Select from the following:

If set to Movie, the image plane uses the movie file assigned in the Image Name field.
While the Image File type can play movie formats supported by IFF, setting the Type to Movie supports high performance (or real time) playback, without IFF.
The following table lists the movie types supported, as well as known issues, on each platform.
Image Name
The path and name of the image file or movie file that the image plane uses when Type is set to Movie or Image File. Image files can be in any Maya-supported image file format.
If off (default), the image plane used is the single image file indicated by Image Name (the file name and extension).
If on, the image loaded corresponds to an image from the sequence selected, determined by the Image Number.
If Use Image Sequence is on, the default expression of “=frame” is used to synchronize the image sequence with the Time Slider.
In other words, at frame 1 the image with a numeric value of 1 in it will be loaded. At frame 24, the image with a numeric value of 24 in it will be loaded.
By modifying the default expression (or removing it and setting keys) for Image Number, you specify alternate timeline to image sequence number relations. For example, setting a key frame of the last image at the beginning of the timeline and the first image at the end of the timeline will result in reversing the sequence.
If Use Image Sequence is on, the default Frame Offset is set to 0, which means that the image sequence numeric value corresponds exactly to the timeline frame number. If an offset between these values is needed, enter the desired offset in frames. For example, if the image sequence numeric value starts at 100 but the animation starts at frame 1, enter a value of 100 to compensate. Negative offset values are also supported.
Use the Placement attributes to position an image plane relative to the camera.
Fit
Controls the size of the image plane relative to the film gate and resolution gate. You can choose a Fit option from the drop-down list. Best is the default Fit.
See also Turn scene view guidelines on or off.
Fit is not available if Image Plane is Fixed.
By default, or if you select Fit to Film Gate, the image plane fills the film gate.
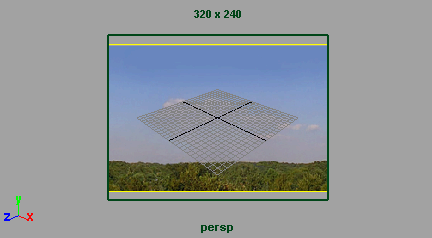
If you select Fit to Resolution Gate, the image plane fills the resolution gate.
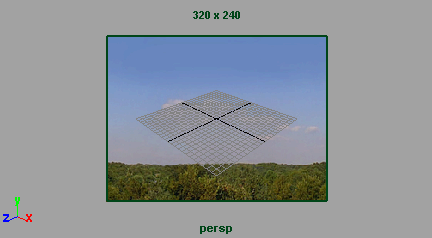
Maya maintains the aspect ratio of the image on the image plane. If the aspect ratios of the image and the film gate (or resolution gate) are different, the image extends beyond the film gate (or resolution gate) and is cropped.
By default, or if you select Fit to Film Gate, the image plane fits horizontally or vertically within the film gate.
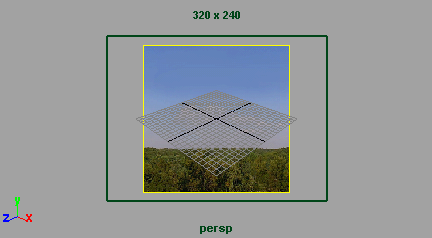
If you select Fit to Resolution Gate, the image plane fits horizontally or vertically within the resolution gate.
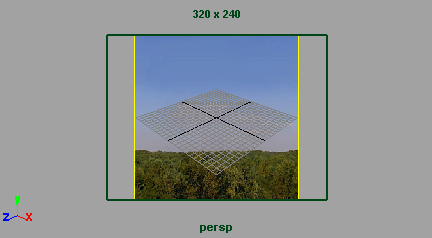
The aspect ratio of the image on the image plane is maintained. If the aspect ratios of the image and the film gate (or resolution gate) are different, the film gate (or resolution gate) extends beyond the edge of the image.
By default, or if you select Fit to Film Gate, the image plane fits horizontally within the film gate.
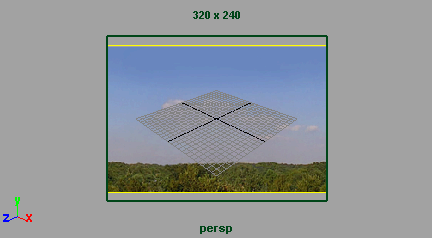
If you select Fit to Resolution Gate, the image plane fits horizontally within the resolution gate.
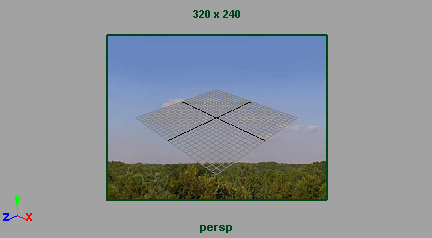
The aspect ratio of the image on the image plane is maintained. If the aspect ratios of the image and the film gate (or resolution gate) are different, the image extends vertically beyond the film gate (or resolution gate) and can be cropped.
By default, or if you select Fit to Film Gate, the image plane fits vertically within the film gate.
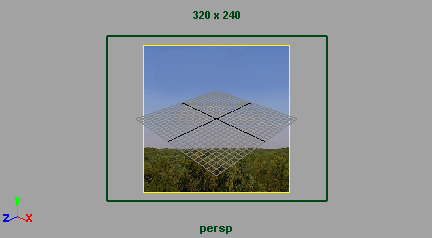
If you select Fit to Resolution Gate, the image plane fits vertically within the resolution gate.
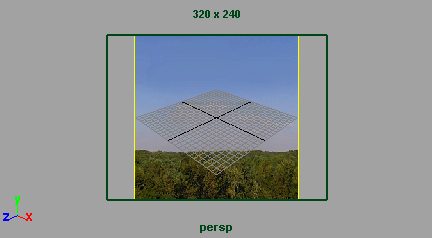
The aspect ratio of the image on the image plane is maintained. If the aspect ratios of the image and the film gate (or resolution gate) are different, the image extends horizontally beyond the film gate (or resolution gate) and can be cropped.
By default, or if you select Fit to Film Gate, the image plane fills the film gate.
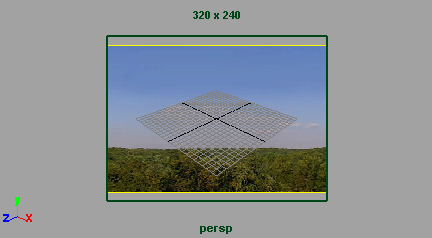
If you select Fit to Resolution Gate, the image plane fills the resolution gate.
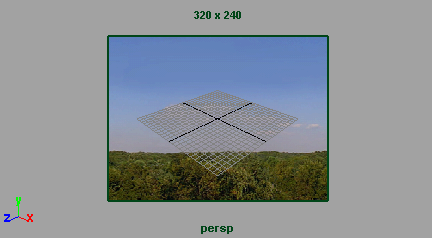
The aspect ratio of the image on the image plane is not maintained. If the aspect ratios of the image and the film gate (or resolution gate) are different, the image stretches to fit within the film gate (or resolution gate).
Scales the image plane so that it is the same size as the resolution gate of the camera. Fit to Resolution Gate has no effect if Image Plane is Fixed.
See also Turn scene view guidelines on or off.
Scales the image plane so that it is the same size as the film gate of the camera. Fit to Film Gate has no effect if Image Plane is Fixed.
See also Turn scene view guidelines on or off.
The Placement Extras attributes control which portion of an image file is visible on the image plane. If Image Plane is Fixed, the Placement Extras attributes also control the position and size of the image plane.
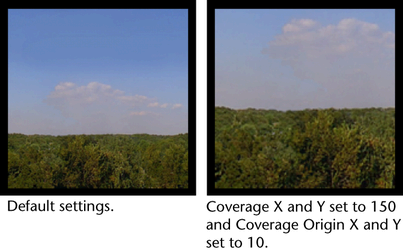
The horizontal and vertical value of the pixel in the image file displayed in the bottom left corner of the image plane. By changing the Coverage Origin X and Coverage Origin Y values, you can scale and offset the image file on the image plane. The default values are both 0.
The following diagram shows what happens to the image plane placement when you adjust Coverage attributes:
Depth
Select one of the following options:
Indicates that the color information should be composited with the depth information. If this option is off, then no color information is written and only the depth information is included. This is useful if you want to post-composite your result in another software package. A preview of the result will be drawn in the scene view.
If on, the depth buffer is oversampled to assign pixel depth values during software rendering. Oversampling helps to reduce aliasing effects that may be introduced using the depth buffer. Oversampling is only used with the software renderer and produces the most optimal results if the depth buffer size is an integral size larger than the image size and the image size is identical to the software render resolutions.